انجمن مدیران و راهبران شبکه
Network Managers and Administrators
انجمن مدیران و راهبران شبکه
Network Managers and Administratorsدرباره من
روزانهها
همه- دستورات تنظیم آدرس IP و سایر پارامتر های شبکه در لینوکس
- آرشیو نرم افزار دانشگاه واشنگتون - دانلود نرم افزارهای امنیتی
- آموزش گام به گام نصب MRTG در لینوکس Ubuntu
- دانلود IOS های سیسکو
- DiGiBoy ، دانلود کرک نرم افزار های راهبری شبکه
- ZABBIX, The Enterprise-class Monitoring Solution for Everyone
- Manageengine, IT Management, Simplified ابزار های مفید جهت مدیریت شبکه
پیوندها
- List of TCP and UDP port numbers
- مرکز اطلاعات، آمار و امور رایانهای دانشگاه فردوسی مشهد
- آزمایشگاه و مرکز تخصصی آپا دانشگاه فردوسی مشهد
- it knowledge exchange
- گروه فناوری اطلاعات پرشین ادمین
- networkexperts
- Online Password Recovery Online Password Recovery
- راهنمای شبکه و آنتی ویروس - نویسنده: مهندس شکوفه قنبری نویسنده: مهندس شکوفه قنبری
- معین مجتهدین یزدی
- ریپوزیتوری یاب لینوکس اوبونتو
ابزارهای آنلاین و اطلاعات تخصصی
- HP ProLiant memory configurator ابزار آنلاین محاسبه حافظه رم سرور های HP
- The free repair guide for everything, written by everyone آموزش تعمیر وسایل و تجهیزات مختلف
- مقالات مفید در خصوص پیکربندی میکروتیک -Mikrotik مقالات مفید در خصوص پیکربندی میکروتیک -Mikrotik
دستهها
ابر برجسب
ایمان مجتهدین یزدی iman mojtahedin yazdi ccna security CCNA VMware Vsphere Datacenter Access Lists Cisco Catalyst 3750G Cisco CCNA Microsoft Windows Server Cisco Catalyst 2960 Cisco CCNA Security Cisco VMWare Vcenter Linuxجدیدترین یادداشتها
همه- راه حل مشکل غیر فعال بودن گزینه های STAGE و STAGE and INSTALL در هنگام بروز رسانی امنیتی نرم افزار VCENTER به نسخه 7.0.3
- بروز رسانی و نصب وصله های امنیتی بر روی سرور VMWare vCenter Appliance که در مود HA(high available) پیکربندی شده
- پیکربندی پروتکل SNMP روی VMWare vCenter Appliance
- جمع آوری برخی دستورات تست و رفع مشکل شبکه در ترمینال Shell هاست ESXi و VMWare vCenter
- رفع مشکل پر شدن پارتیشن Archive هارد اپلاینس vCenter v6.7
- نحوه اضافه نمودن آدرس شبکه دوم به VMWare vCenter v6.7
- پیکربندی SNMP v2.0 بر روی سیستم عامل VMWare ESXi 6.5
- راه اندازی WiFi Hotspot در مایکروسافت Windows 10
- Disable Storing History of Commands in LINUX
- سناریوی آماده آزمون عملی دوره APA-133 آزمایشگاه آپا - دانشگاه فردوسی مشهد
- دانلود جدیدترین نسخه نرم افزار Cisco Network Assistant Version 6.3.2
- کشف آسیب پذیری حیاتی در برخی سوئیچ های سیسکو و دانلود IOS های جدید - Download New Cisco Switch IOS
- راه کاری جهت رفع مشکل عدم امکان دسترسی به کنسول وب Cisco Prime Infrastructure
- [ بدون عنوان ]
- مشکل نصب آپدیت KB2982006 بر روی Windows Server 2012 R2 در زمان راه اندازی Microsoft Skype for Business
بایگانی
- بهمن 1400 1
- بهمن 1398 1
- آذر 1398 2
- شهریور 1398 2
- مرداد 1398 1
- آذر 1397 1
- اردیبهشت 1397 2
- فروردین 1397 2
- بهمن 1396 1
- دی 1396 1
- آبان 1396 1
- مرداد 1396 3
- اردیبهشت 1396 1
- فروردین 1396 1
- بهمن 1395 1
- دی 1395 1
- آبان 1395 3
- مهر 1395 1
- شهریور 1395 3
- مرداد 1395 2
- خرداد 1395 2
- اردیبهشت 1395 1
- فروردین 1395 2
- اسفند 1394 2
- بهمن 1394 3
- دی 1394 1
- آبان 1394 1
- مهر 1394 1
- مرداد 1394 3
- خرداد 1394 1
- اسفند 1393 3
- آذر 1393 1
- شهریور 1393 1
- خرداد 1393 1
- اردیبهشت 1393 1
- بهمن 1392 2
- دی 1392 1
- آذر 1392 5
- آبان 1392 2
- شهریور 1392 4
- مرداد 1392 2
- تیر 1392 1
- خرداد 1392 2
- فروردین 1392 2
- بهمن 1391 2
- مهر 1391 1
- مرداد 1391 4
- خرداد 1391 3
- آبان 1390 1
- مرداد 1390 1
- تیر 1390 1
- خرداد 1390 3
- فروردین 1390 1
- بهمن 1389 1
- آبان 1389 3
- مهر 1389 1
- شهریور 1389 4
- مرداد 1389 1
- تیر 1389 3
- خرداد 1389 2
- اردیبهشت 1389 5
- فروردین 1389 6
- بهمن 1388 2
تقویم
بهمن 1400| ش | ی | د | س | چ | پ | ج |
| 1 | ||||||
| 2 | 3 | 4 | 5 | 6 | 7 | 8 |
| 9 | 10 | 11 | 12 | 13 | 14 | 15 |
| 16 | 17 | 18 | 19 | 20 | 21 | 22 |
| 23 | 24 | 25 | 26 | 27 | 28 | 29 |
| 30 |
جستجو
دانلود جدیدترین نسخه نرم افزار Cisco Network Assistant Version 6.3.2
دانلود جدیدترین نسخه نرم افزار Cisco Network Assistant Version 6.3.2
این پست در تاریخ چهارشنبه 22 فروردین 1397 بروز رسانی شد !!!
مراحل ریست نمودن پسوورد یوزر ROOT در لینوکس
If you forgot your root password for your debian server use the following procedure to reset.
Boot to the GRUB menu. Then, press <e> (for edit) before Linux has a chance to boot.
Using your keyboard arrow keys, move the cursor down a line or so, and press <e> (for edit) again, you should now be on the kernel line, and press <End> to go out to the very end of that line. Now hit the spacebar once, if necessary, to add a space, and then add one of the folllowing:
init=/bin/bash
or
init=/bin/sh
Then press <Enter>, and you're back at the kernel line, press <b> (for boot) and the computer will proceed to boot to a root prompt.
At this point, the root file system is still mounted read-only, so enter the following command:
mount -n -o remount,rw /
Then type:
passwd
Enter your new password. Retype if asked to confirm.
Then restart the machine by typing:
reboot
Now you should be able to login with your new root password as required.
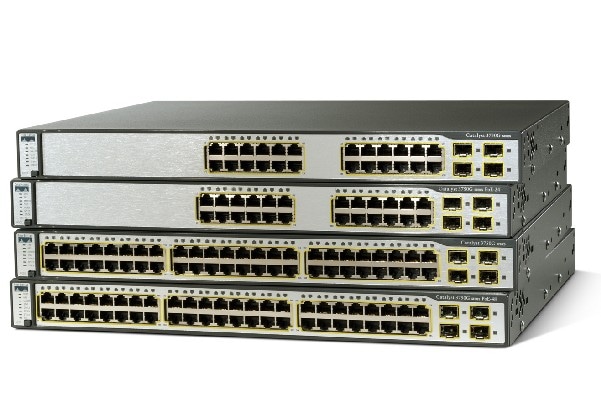
دانلود IOS های جدید سوئیچ های سری Cisco catalyst 2960 و Cisco catalyst 3750e
سلام صبح بخیر 
بنا بر درخواست بسیاری از دوستان و همکاران، آخرین نسخه IOS مربوط به دو سوئیچ متداول Cisco catalyst 2960 و Cisco catalyst 3750e رو برای استفاده شما دوستان از وب سایت شرکت Cisco دانلود کردم که می تونید از این قسمت دانلود نمایید.

| Description: | LAN BASE |
| Release: | 15.2.2E5 |
| Release Date: | 07/Jun/2016 |
| File Name: | c2960-lanbasek9-mz.152-2.E5.bin |
| Min Memory: | DRAM 128 MB Flash 64 MB |
| Size: | 13.96 MB (14635349 bytes) |
| MD5 Checksum: | 4ab00188887e9844bd8d1db83adbbf20 |
| Description: | IP BASE |
| Release: | 15.0.2-SE10 |
| Release Date: | 21/Jul/2016 |
| File Name: | c3750e-ipbasek9-mz.150-2.SE10.bin |
| Min Memory: | DRAM 256 MB Flash 64 MB |
| Size: | 19.49 MB (20432128 bytes) |
| MD5 Checksum: | 9146e34146a53662a42af28d272789fb |
تهیه Image از هارد دیسک های یک هاست لینوکسی با استفاده از دستور dd

سلام و خدا قوت؛
چند وقت پیش بنا بر دلایلی لازم شد از هارد های یک سرور لینوکسی Image تهیه کنم. سرور مورد نظر از از نوع Rack mount بود و هارد ها هم به کمک RAID controller بصورت RAID 10 به دو آرایه 1.2 ترابایتی تنظیم شده بودند. بنا بر این تقریبا همه راه کار های قدیمی که می شناختم ( ACRONIS ، Symantec و ... ) کمک زیادی به من نکردن. با راهنمایی یکی از دوستان خوب ( Mr.T ) یک روش بسیار کارآمد رو برای اولین بار امتحان کردم که اینجا برای اطلاع شما به اشتراک میزارم. البته من زیاد با سیستم عامل Linux آشنا نیستم و شاید برای کاربران حرفه ای این سیستم عامل ابزار بدیهی و معمولی باشه.
باری به هر جهت:
- مرحله اول شناسایی درایو های منطقی موجود بر روی سرور( البته این همون سروری که توصیفشو کردم نیست):
[root@misdb1 ~]# fdisk -l
Disk /dev/cciss/c0d0: 73.3 GB, 73372631040 bytes
255 heads, 63 sectors/track, 8920 cylinders
Units = cylinders of 16065 * 512 = 8225280 bytes
Device Boot Start End Blocks Id System
/dev/cciss/c0d0p1 * 1 19 152586 83 Linux
/dev/cciss/c0d0p2 20 1039 8193150 82 Linux swap / Solaris
/dev/cciss/c0d0p3 1040 8920 63304132+ 83 Linux
Disk /dev/cciss/c0d1: 73.3 GB, 73372631040 bytes
255 heads, 63 sectors/track, 8920 cylinders
Units = cylinders of 16065 * 512 = 8225280 bytes
Device Boot Start End Blocks Id System
/dev/cciss/c0d1p1 * 1 8920 71649868+ 83 Linux
Disk /dev/cciss/c0d2: 73.3 GB, 73372631040 bytes
255 heads, 63 sectors/track, 8920 cylinders
Units = cylinders of 16065 * 512 = 8225280 bytes
Device Boot Start End Blocks Id System
/dev/cciss/c0d2p1 * 1 8920 71649868+ 83 Linux
- تهیه نسخه Backup یا Image از روی یکی از درایو های سرور بر روی یک هارد اکسترنال :
dd if=/dev/cciss/c0d0 of=/media/police6/misdbdsk1.dd
بقیه اطلاعات مربوط به دستور DD رو میتونید از لینک ویکی زیر مطالعه کنید :
http://en.wikipedia.org/wiki/Dd_%28Unix%29


